Working with Pressed Chrome
At Vacation Nail Shop, we love a chrome moment and we want you to love a chrome moment as much as we do. In honor of our Cyber Chrome launch, here some tips and tricks to get the most out of your chrome application.
The biggest lesson I can impart on you is that chrome + unintentional texture = bad. You want to make sure that you’re starting with smooth and even base and color application before you even think of adding chrome.
My absolute favorite gel for chrome application is Pre Art Gel by Presto, specifically the bottle formula. It’s not a top gel and it’s not a base gel, it’ just a clear gel with a barely-there inhibition layer that is the perfect match for both loose and pressed chrome. If I’m doing a full chrome nail, I’ll usually try to put a similar color underneath it just in case I end up with a whoopsie. You do you, but I highly recommend at least a nude base color under chrome.


Once you’ve mastered your base and color application (no lumps) and done any finish filing necessary, we’re going to work one finger at a time and apply Pre Art Gel, cure for 20-30 seconds and then immediately apply chrome. Pre Art Gel, cure, chrome, switch until you’re done.
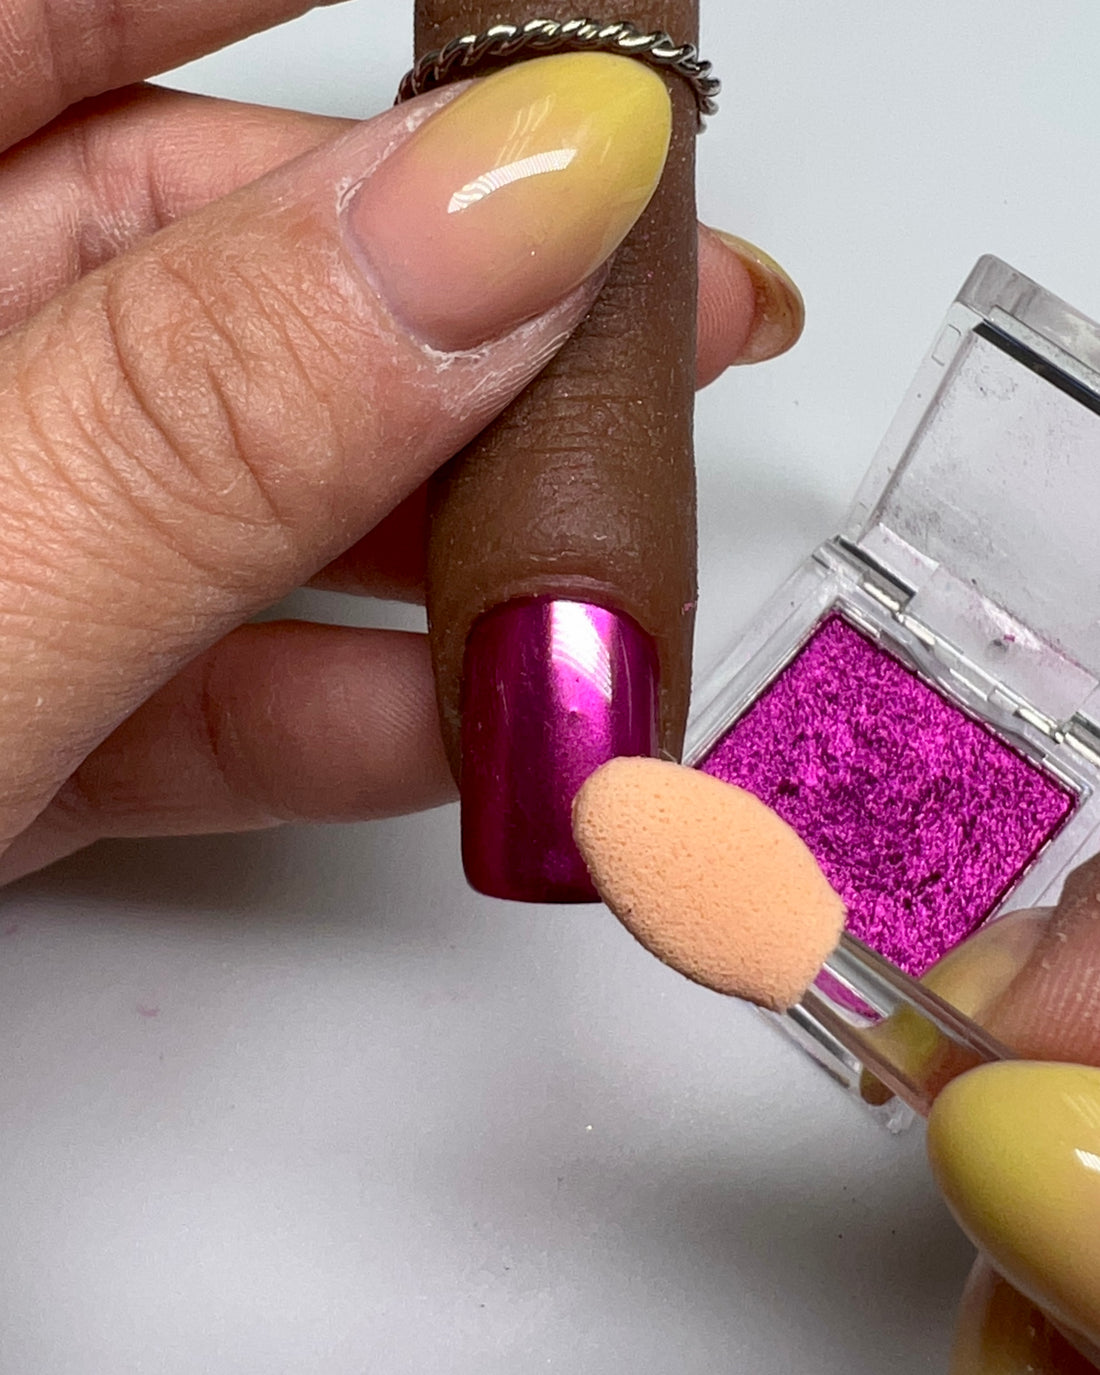
There are lots of ways to apply chrome, but my personal favorite will always be with a makeup wedge sponge, personally, I am not a fan of using my fingers to apply chrome. You don’t want to use a bare finger ever in pressed chrome as the oils from your skin can affect not only the finish of the chrome, but it can also cause the powder in the compact to get hard spots. If I’m doing a small, isolated chrome moment, I’ll use a eyeshadow sponge applicator or tear a makeup wedge into a smaller piece, for the full nail, I’ll always use a makeup wedge sponge.
Once your chrome is applied and loose powder dusted removed from your nail- take a fine grit buffer or file and gently remove chrome from the free-edge of your nail and wipe away any dust and debris and one finger at a time add a layer of clear base gel and cure. We want the cured gel underneath your chrome to have something to connect with to create a bond. Once again, applying and curing one finger as a time.
After the chrome has been sealed, absolutely no nail filing. You’re done. Live with a slightly left-leaning almond or if you MUST file, you’re going to have to re-seal the chrome. Trust me, it’s best to just fix any shape issues before the chrome ever touches the nail.
Once your over-the-chrome base gel is cured, you can add your top gel and fully cure.
If you’re looking for a more in-depth digital chrome class, I highly recommend Sashanie Gray’s Virtual Chrome class.